

Saturday, December 15, 2012
Friday, October 12, 2012
DYI Craft Room/Office
Hi, I'm Kim. I've been married for 37 years to one amazing man. We've raised 4 children, and now enjoying being grandparents to our 3 grandchildren. Along with working for a major airline for 24 years I also have my own Cakepop business. Not only do I make and sell the the ever so popular Cakepops, I also host monthly instructional cakepop classes. When time allows I blog at Cakepops101. I'm excited to share with Linda at Craftaholics Anonymous and all you DYI addicts, my craft room remodel.
When I started my Cakepops101 business from home, I knew I needed to update my craft room to also double as an office work space. My original crafting room consisted of a few shelving pieces I purchased from goodwill and a folding table used as my desk.
BEFORE


As you all know the first step to any big project can be the hardest but once you start brain storming and determing a budget and functionallity of your space your off and running. I did have a bit of a push to get my project started when a good friend decided to remodel her kitchen and remove all of her oak whitewash cabinets. Being the DYI junkie I am, I didn't hesitate to ask her if I could take all the old cabinets off her hands, and was very excited when she said yes! I do admit, thanks to my dad, I have a hard time throwing anything away. My husbands works hard at keeping me in check.


The first job on our list was to remove all the old carpet and install wide plank laminate flooring purchased on sale for 50% off from Costco. This helped get our budget off in the right direction. My hubby also installed 4 counter height outlets so power would be right where I needed it. He is one handy guy and can do just about anything. I know I'm a very lucky gal.

I do give my husband most of the credit, when it comes to heavy lifting, sanding, priming, painting and all the detailed trim work, but just as important, of all his support and patience. It took me the longest time to decide on a finished paint color, along with the actual room layout. I wanted to try and use as many of the cabinets as I could get to fit in the 11x12ft room. I removed a couple of doors and tested out colors and glaze finishes. I love the vintage shabby look and setteled for a Behr Semi gloss at Home Depot and Martha Stewart's Finishing Glaze. All the original hinges were refinished by priming and spay painting dark brown. At $3 a piece for new ones, this saved me at least $200 + and looked great. We primed all cabinets with a power sprayer, however when it came time for the finish paint and glaze, I did that after the cabinets were actually in the room. The rustic door knobs were also 50% off from Hobby Lobby.

To determine the layout of the cabinets, I cut large scraps of cardboard the size of each base cabinet. Laying these on the floor and moving them around to decide what would fit best was so much easier than draging each cabinet around the room all day. I was able to use all cabinets but 2 wall cabinets. I took a base cabinet and used it as island that I could move if more space was needed. After getting a $1500 quote for laminate counters, I decided that I would just have MDF cut to fit, paint and trim for a cost of $80. MDF isn't water resistant so you do careful with liquids. I covered the island with a cute piece of fabric from Hobby Lobby, then added a piece of plexi glass to the top of it.
I built the hutch styled shelves to go over the last base cabinet. Didn't take me long to fill each and everyone of them with books, and all of my Cakepop supplies.


It's such a great feeling to be able to take on a project of this size, work through the challenges and then be able to sit back and enjoy what you've accomplished. Thanks all for stopping by!
When I started my Cakepops101 business from home, I knew I needed to update my craft room to also double as an office work space. My original crafting room consisted of a few shelving pieces I purchased from goodwill and a folding table used as my desk.
BEFORE


As you all know the first step to any big project can be the hardest but once you start brain storming and determing a budget and functionallity of your space your off and running. I did have a bit of a push to get my project started when a good friend decided to remodel her kitchen and remove all of her oak whitewash cabinets. Being the DYI junkie I am, I didn't hesitate to ask her if I could take all the old cabinets off her hands, and was very excited when she said yes! I do admit, thanks to my dad, I have a hard time throwing anything away. My husbands works hard at keeping me in check.


I do give my husband most of the credit, when it comes to heavy lifting, sanding, priming, painting and all the detailed trim work, but just as important, of all his support and patience. It took me the longest time to decide on a finished paint color, along with the actual room layout. I wanted to try and use as many of the cabinets as I could get to fit in the 11x12ft room. I removed a couple of doors and tested out colors and glaze finishes. I love the vintage shabby look and setteled for a Behr Semi gloss at Home Depot and Martha Stewart's Finishing Glaze. All the original hinges were refinished by priming and spay painting dark brown. At $3 a piece for new ones, this saved me at least $200 + and looked great. We primed all cabinets with a power sprayer, however when it came time for the finish paint and glaze, I did that after the cabinets were actually in the room. The rustic door knobs were also 50% off from Hobby Lobby.

I built the hutch styled shelves to go over the last base cabinet. Didn't take me long to fill each and everyone of them with books, and all of my Cakepop supplies.


I made a magnetic chalkboard out of a mirror from an old dresser.


It's such a great feeling to be able to take on a project of this size, work through the challenges and then be able to sit back and enjoy what you've accomplished. Thanks all for stopping by!
Sunday, September 2, 2012
Loving GRAY

I'm Loving gray and perhaps a living room makeover is in my future. These doors would be the direction I would begin.
Saturday, August 25, 2012
Vintage Wedding shopping
April's wedding isn't till March, but I'm taking advantage of having time on my side. As the months draw closer there will be plenty of stress to go around for us all. Today the wedding collection has begun with two beautiful gray damask chairs that i thought would be perfect for the Bride and Groom's table. The vintage suit case will be for guests to put wedding cards in. I found the perfect coordinating yellow and gray papers from Papervineyard, in Chandler, to make a banner to string across the inside. It's a beginning to a beautiful spring wedding. Also in the works will be a vintage tag for the back of each chair, MR & MRS. Thank goodness for Pinterest right?


Thursday, August 16, 2012
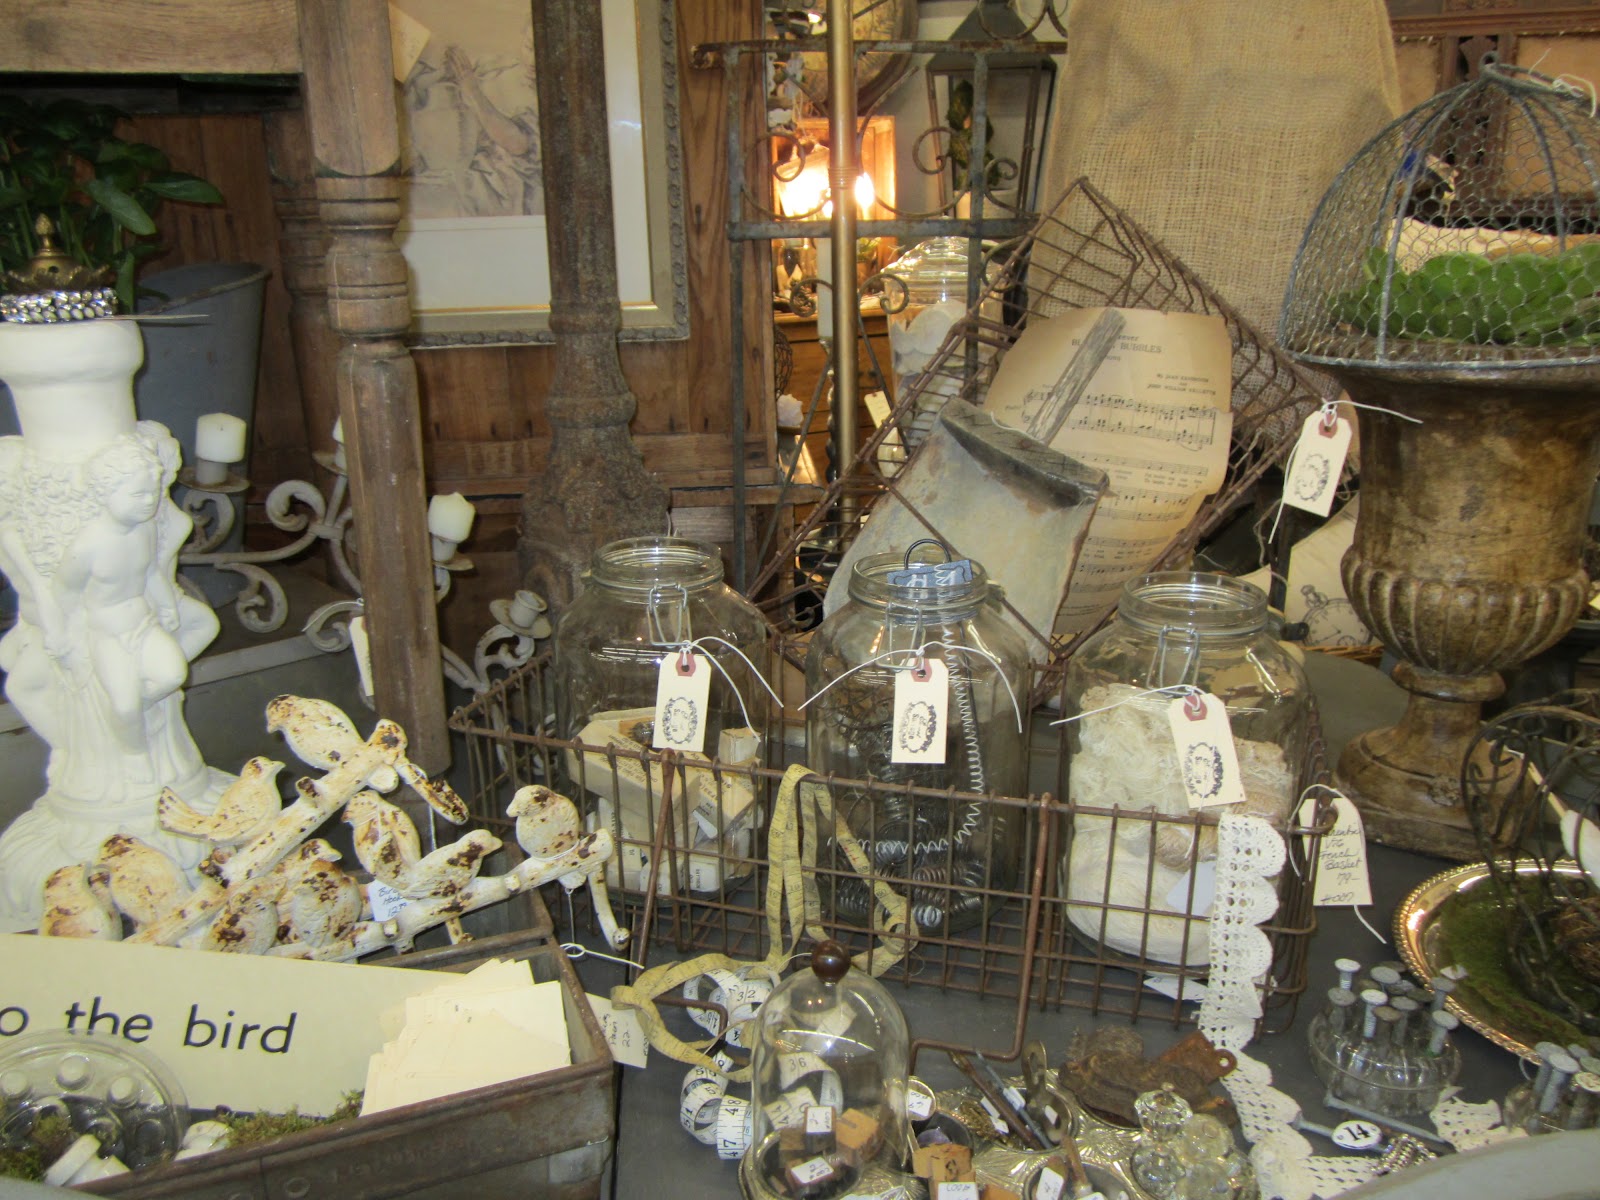
Sweet Salvage- Antiques & so much more

How did I not know about Sweet Salvage? Well today I got to meet her and the wonderful women that are the heart and soul behind the magical doors. I received a phone call a couple days ago asking if I would be able to make some of my Cakepops for their store opening today. Celebrating their 1st Birthday, with a perfect event theme "Let them eat cake", BTW thanks Phoenix New Times for the mention. It was only a few days ago I ran across an article about Sweet Salvage, so immediately I went to facebook to find them. Yes I fell in love with just one look at their Sweet blog photos. If you like vintage, one of a kind everything you must make the drive. No time to think as they are only opened 4 days a month, the 3 week of each month, Thurs-Sun. Now that's enough to make you go jump in your car now. My daughter April came along to help me set up my Cakepops on their adorable desert table, located perfectly at the front door. I could of spent the day there had it not been for my other job getting in the way...again. Everything displayed was as if it had a life of it's own, just waiting to be taken to a new home to be loved. Before the doors were opened and the patiently waiting crowd was allowed in, April and I were lucky to have some time to quickly walk the store. As leaving we did notice the line did wraped around the building Yes I'll be back. Just take a look at a few pictures I took and you'll see why. Enjoy and you still have 3 days left to plan your visit there. Inspiring is their story, an idea and women who believed they could make it come to life, so SWEET it is.
Happy Birthday Sweet Salvage and many many more to come!


If you have a special day, celebration or event, Cakepops are the perfect sweet to serve your guests coming back for more. Take a look at what I've made here on my Cakepops101 facebook page. I'm in Chandler, AZ and just a phone call or email away. Cakepops101@cox.net Thanks for stopping by.


Sunday, August 5, 2012
Handheld Pies by Sara Billingsley & Rachel Wharton
Who doesn't love a great cook book? One of my weaknesses, especially if they have great photos of the recipes. Since we are going to do a desert table at April's wedding, I'm on the look out for different types of mini deserts to help fill the table. Handheld Pies, I found at Joann's for $12.99 with my 40% off coupon or you can find it here on Amazon. I will usually look through a book to see if I think I will make something out of it, at least one recipe anyway justifies the purchase in my book anyway. A meal cooked at home is an easy $30-$40 savings right.? But the pictures and the ease of the recipe are usually what sells me. This book if filled with handheld pies of all kinds, but also as a bonus there are a few surprises in it also. I'm proud to say I've only had the book a week and I dove it and made something I've never made before. Shepard Pie. They were so easy to make, and they way they were served up in the book even made me run out and purchase some pint size mason jars. I also stopped by Dilly Deli and bought a few of their bread bowls to fill with the remaining Shepard's pie ingredients and bake in the oven, just till the bowls got crispy. They were so good, and proved to be a quick meal to throw together. Ground beef, onions, diced carrots, peas, corn, beef broth and a bit of flour, salt pepper to taste. Mashed potatoes to add to the top, just warm and let the potatoes brown a bit. I even added some shredded cheese to the tops of my potatoes. They didn't last long, and I would recommend the bread bowls for nice individual servings.

 Authors Sara Billingsley and Rachel Wharton put together a sweet little book that's had a lot to offer.


Thursday, July 26, 2012
Wedding Colors Yellow and Gray
The bridal party has been asked, the venue has been chosen and the colors selected.Yellow and Gray... I love how the yellow and gray compliment one another. So fresh and perfect for April and Matt's early spring wedding. With time on our hands we can wallow in all the beautiful wedding that have come before, which will help in making their wedding day perfect.


Wednesday, July 11, 2012
Easy Magnet Board
I love magnet boards, all sizes, shapes and colors. Here is a quick and easy magnet board to make using a 14x36 poster frame, under $10. A piece of sheet metal same size as frame opening, I'm lucky as there is a sheet metal business less than a mile from my house. 3 pieces of 12x12 scrapbook paper, $1.50. I purchased my little magnet containers from IKEA, they are $4.99 pkg. I will use these containers to keep all those little embellishments that you know you bought but just can't remember where they are. The lids are clear so it makes it very easy to keep all the little things you love organized. I may still glaze the cream frame with a bit of brown, but I've had my share of the paint brush for a bit.


Island Expansion
My island surface measures 24x48, however when Home Depot cut the MDF for the top, I also saved the 14x48 remaining piece. I knew there would be times when I would want a larger work surface. I also had the extra piece of plexiglass. I purchased 2 shelf brackets for $3 each from IKEA that hook on with 2 screws and easy to pop off when not needed. This allows me to quickly expand the island surface for big projects. I will add a couple of hooks to the back of the extension and just hang it on the island when not using. Originally I was going to do a drop leaf design for the extended island, but at this point I just wanted quick and simple. Perhaps late I will go back to the drawing board, but for now this will work just fine.


If you can stand the maze of IKEA you can find unusual items for cheap. I just don't like walking the entire store when looking for a specific item. I managed to get in an out pretty quick so it was worth the trip this time. There have been plenty of times however that I have just left my cart standing when I felt like I was having to work to hard to spend my money. Day of Little patience I guess.


If you can stand the maze of IKEA you can find unusual items for cheap. I just don't like walking the entire store when looking for a specific item. I managed to get in an out pretty quick so it was worth the trip this time. There have been plenty of times however that I have just left my cart standing when I felt like I was having to work to hard to spend my money. Day of Little patience I guess.
Monday, July 9, 2012
My Little Cupcake Variety Pack Winner
Congratulations to Tracy for winning the My Little Cupcake Variety mold pack. If you are interested in purchasing one of these wonderful My Little Cupcake Variety packs, go here to My Little Cupcake website. Thanks all for following, keep a eye out for the next giveaway coming soon. Tracy please email me your full name, address and phone contact to Cakepops101@cox.net.


Sunday, July 8, 2012
Thrifty Decor Chick
Check out July's before and after party at Thrifty Decor Chic, I'm linking up my craft room here, come join in and share what you've done.

Thursday, July 5, 2012
Giveaway has been extended.
The 4th of July GIVEAWAY has been extended to allow those who were not able to access my blog over the holiday. A winner will be drawn on July 10th. I apologize for any inconvenience due to blogger issues and appreciate your participation. Good luck ALL and thanks for following Cakepops101.
Tuesday, July 3, 2012
Happy 4th of July- Giveaway

Everyone loves a giveaway and Thanks to My Little Cupcake, Cakepops101 will be giving away their sweet My Little CupcakeVariety mold pack. These are a must have, and I absolutely love mine. My little cupcake blog is full of ideas for just about every occasion and holiday. They are perfect using the no-bake cakepop recipe or the traditional Bakerella recipe. Both are delish, fun and easy to make. So how do you win? EASY EASY, just leave a comment on this blog post, if you don't follow my blog you will have to leave your full name so I will know who you are :-). You can earn an extra chance by posting giveaway to your Facebook or your blog and leave a additional comment letting me know. If you want an extra entry, leave a comment telling me the actual name of what color I painted my cabinets in my newly remodeled craft room. HINT, answer can be found here. Of those who leave a comment, One random winner will be selected after the fireworks are over. Good luck and HAPPY 4th of JULY!
NOTE :If you follow my blog, your name will appear with your comment, if not you will need leave your name so I know who you are :-)
My Little Piece of Heaven
The idea was born when a good friend of mine decided to remodel her kitchen. She had those beautiful oak "Whitewash" cabinets, that over time start to actually look pink. So yep I asked her "gee what are you going to do with all your old cabinets?" She replied "nothing, you want them?" Course those who know me understand the wheels were already turning in my head... "YES YES of course I want them!" So the first hurdle was to get my hubby on board, one because I needed his muscle to load them up and two would need his patience most of all. As we all know great things don't happen overnight right? Because he is absolutely the best hubby a girl could ask for he was up for my challenge. The project involved quite a bit of planning and executing, starting with picking up all the cabinets and bringing them to my house, figuring out where to store them as they went through the various stages of prep, where exactly in my home would they be installed and a design plan. As a couple of my grown kids have returned home multiple times, my craft room has been moved a few times to accommodate them. My craft room consisted mostly of goodwill furniture re purposed into storage for all my craft madness. Now that I was lucky owner of 20 wall and base cabinets, I needed to make the first decision, where would my new room live. My hubby proposed our formal living and dining room as it like most just sits there collecting dust and waiting for the two big holidays to get used, Thanksgiving and Christmas. The room measures 16x25 and I must admit was very tempting, but instead decided to use the room that was currently being used as our home office, and is 12x11. The project can now begin. The goal was to use as many of the cabinets as I could possibly squeeze into the room, adding lots of work surface and a center island. My husband who reconstructed accidents, used his skills to scale the room and cabinets to size. From there I was able to determine what cabinets would fit where. The project begins....
Bringing the cabinets home,
Thank goodness we had the space in our garage to store them as I began the prep process. They took up alot of room but we managed to them on top of one another minimizing the space needed.


Now to figure out what color I wanted took way more time then it should of, but my thought was I was I knew it was going to take many hours of prep work, I only wanted to paint them once. When I came upon this beautiful canvas I knew the colors that would be used. It's not blue and not green but somewhere in the middle.

After going through many paint samples I came up with the color Harmonics by Behr from Home Depot.
I also wanted them to look shabby and vintage, so I also decided to glaze them with Martha Stewarts glaze, which made all the difference and exactly the look I wanted to achieve.
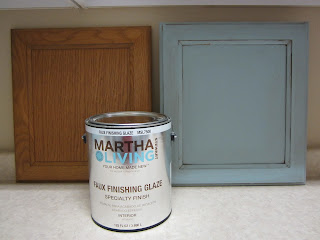
My husband purchase a paint sprayer to prime the cabinets. He lightly sanded each one and them primed all the cabinets and doors. I removed all the door hinges and primed and painted them, as they were brass and I didn't want to purchase new hinges, even at $3 a piece that can add up. I went with dark brown on the hinges. I would later find the perfect knobs at one of my favorite stores Hobby Lobby. As they are always 50% off they were $1.50 each, quite the bargain. The priming and the painting of the cabinets took quite some time, but we were able to complete the prep before the AZ heat arrived. We have a nice big concrete side yard, so it worked well as a painting station.
The next step was to pack up the office, remove the large heavy 3 piece desk, and remove all the carpet as we both agreed our favorite wide plank laminate would be the best flooring. Again luck was on our side, and we found the flooring at Costco, and on SALE for $1.25 sq ft. Total cost for new floor was under $200. I must say Charlie and I have gotten pretty good at installing wood flooring over the years and we love how it looks and it's durability. It took us a day to install.

Cabinets painted and installation begins. I decided to do the finish paint coat and glazing process after they were actually installed. I'm lucky to have a brother who builds homes as his trade, and that he was willing to give up a weekend to help us install the cabinets. Before the cabinets went I asked Charlie to install some counter height outlets for me, this would allow me to have power anywhere on the work surface area. He is also a pro and electrical, lucky me again.

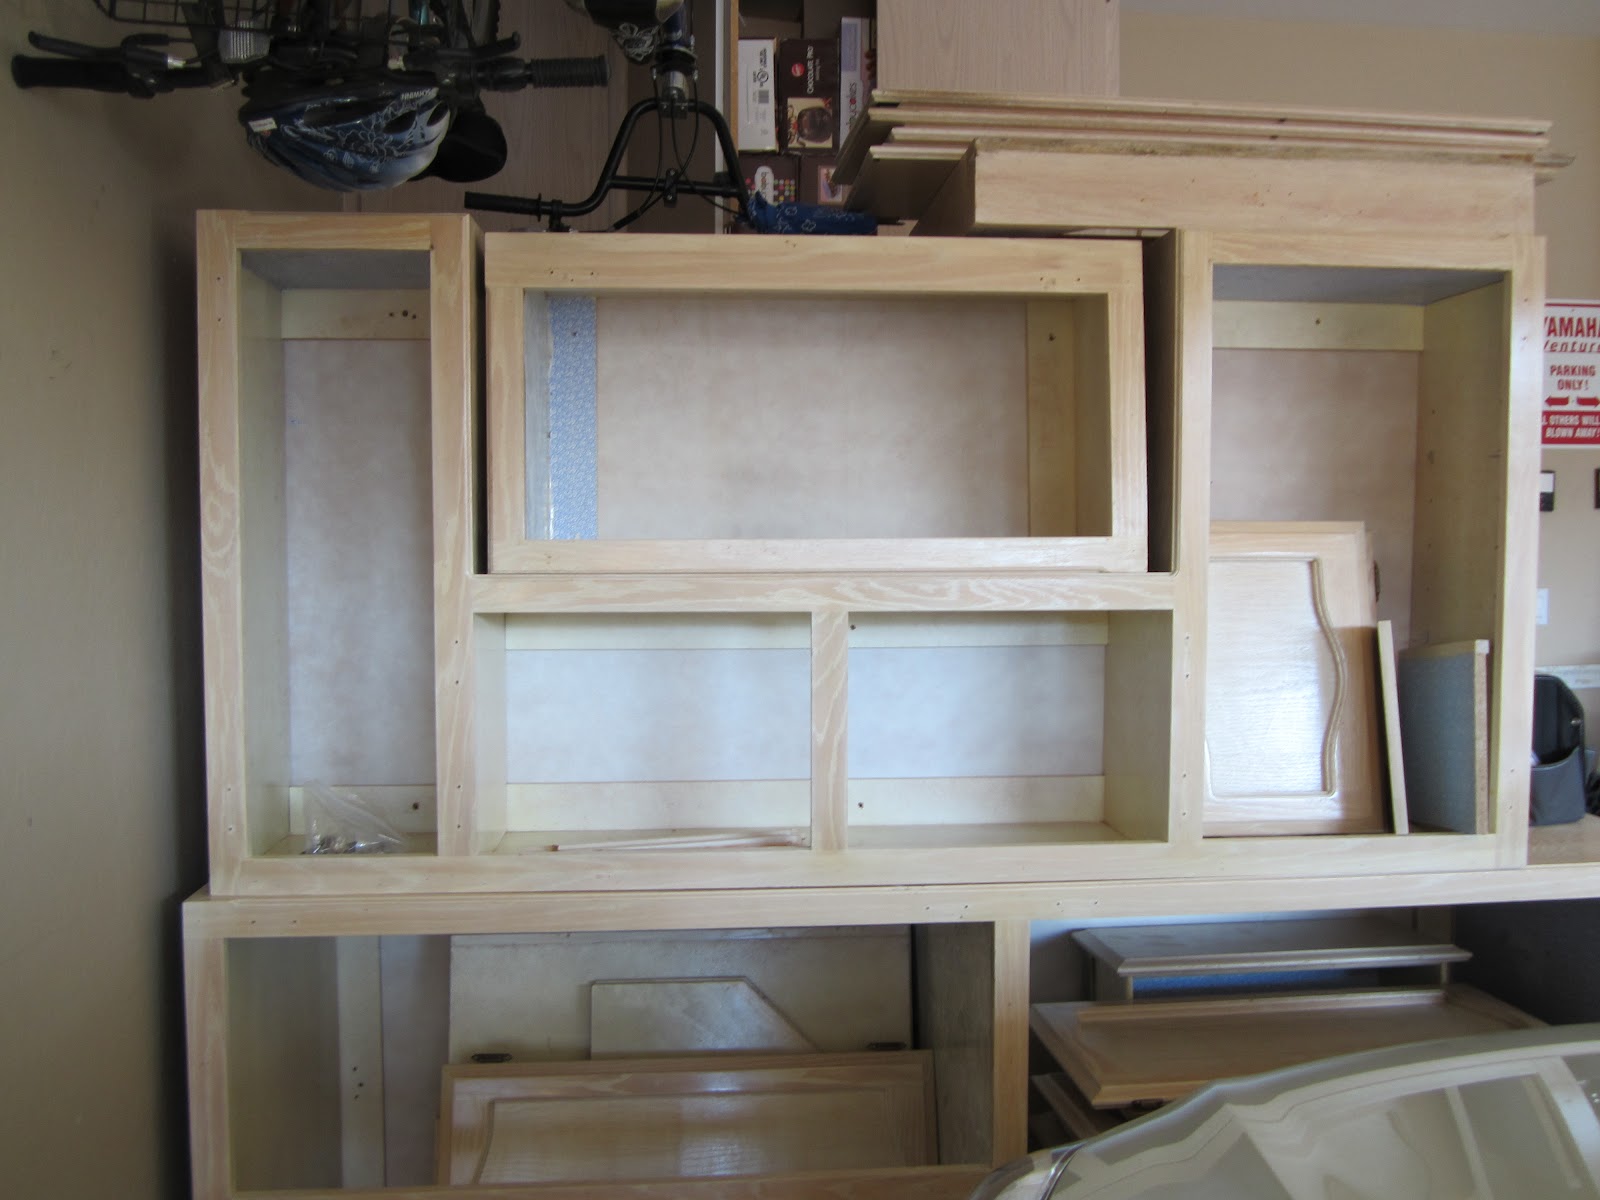
To help get a better visual, I cut out cardboard the actual length of each cabinet, it helped in playing around with the final layout design and allowed me to move pieces around without actually moving any cabinets until the we came up with the best configuration. The wall cabinets gave me the most challenge as they were each made to go over a specific cabinet when in their original kitchen, so it took time to figure it all out. Being a bit symmetrical, I like things to line up but knew that wasn't going to be possible what we had to work with. Cabinets that went over a store, did end up being the one I liked the most, you'll understand why when you see the finished room. Primer and dark brown spay paint make my hinges like new.


Cabinets installed and now the little details, adding door knobs, trim,molding, accessories, magnet black board. Least favorite part, moving everything in, although it did allow me to see exactly what I have and finding a new home for it all.
I purcashed 2 sheets of 3/4 MDF and had home depot rip all pieces to make my counter tops and hutch. Cost for products purchased, MDF $80, primer 3 cans $60 finish paint $70, glaze $25. Knobs $39, flooring $175, and my hubby insisted on a new flat screen which fit just right in my wall cabinet. Yes I know he spoils me. He even got me my own personal air conditionor because the room just happens to be the warmest room in the house. go figure. Now I can cool my room down without having to cool the other 4,000 sq ft.. It couldn't have turned out any better and I absolutely love the finished room! So if you ever hear of someone remodeling their kitchen, don't walk but RUN to claim their old cabinets, you won't be sorry.


 My view to the backyard

Lots of storage space here and in the hutch


 Love all hutch we built to finish the room


Final touch was to purchase some cute fabic from Hobby Lobby and cover the counter on my island, then added a cut piece of plexiglass to make a smooth durable work surface. And yes even Randall's dog Jackson likes the new room.

Bringing the cabinets home,
Thank goodness we had the space in our garage to store them as I began the prep process. They took up alot of room but we managed to them on top of one another minimizing the space needed.


Now to figure out what color I wanted took way more time then it should of, but my thought was I was I knew it was going to take many hours of prep work, I only wanted to paint them once. When I came upon this beautiful canvas I knew the colors that would be used. It's not blue and not green but somewhere in the middle.

After going through many paint samples I came up with the color Harmonics by Behr from Home Depot.
I also wanted them to look shabby and vintage, so I also decided to glaze them with Martha Stewarts glaze, which made all the difference and exactly the look I wanted to achieve.

My husband purchase a paint sprayer to prime the cabinets. He lightly sanded each one and them primed all the cabinets and doors. I removed all the door hinges and primed and painted them, as they were brass and I didn't want to purchase new hinges, even at $3 a piece that can add up. I went with dark brown on the hinges. I would later find the perfect knobs at one of my favorite stores Hobby Lobby. As they are always 50% off they were $1.50 each, quite the bargain. The priming and the painting of the cabinets took quite some time, but we were able to complete the prep before the AZ heat arrived. We have a nice big concrete side yard, so it worked well as a painting station.
The next step was to pack up the office, remove the large heavy 3 piece desk, and remove all the carpet as we both agreed our favorite wide plank laminate would be the best flooring. Again luck was on our side, and we found the flooring at Costco, and on SALE for $1.25 sq ft. Total cost for new floor was under $200. I must say Charlie and I have gotten pretty good at installing wood flooring over the years and we love how it looks and it's durability. It took us a day to install.

Cabinets painted and installation begins. I decided to do the finish paint coat and glazing process after they were actually installed. I'm lucky to have a brother who builds homes as his trade, and that he was willing to give up a weekend to help us install the cabinets. Before the cabinets went I asked Charlie to install some counter height outlets for me, this would allow me to have power anywhere on the work surface area. He is also a pro and electrical, lucky me again.

To help get a better visual, I cut out cardboard the actual length of each cabinet, it helped in playing around with the final layout design and allowed me to move pieces around without actually moving any cabinets until the we came up with the best configuration. The wall cabinets gave me the most challenge as they were each made to go over a specific cabinet when in their original kitchen, so it took time to figure it all out. Being a bit symmetrical, I like things to line up but knew that wasn't going to be possible what we had to work with. Cabinets that went over a store, did end up being the one I liked the most, you'll understand why when you see the finished room. Primer and dark brown spay paint make my hinges like new.


Cabinets installed and now the little details, adding door knobs, trim,molding, accessories, magnet black board. Least favorite part, moving everything in, although it did allow me to see exactly what I have and finding a new home for it all.
I purcashed 2 sheets of 3/4 MDF and had home depot rip all pieces to make my counter tops and hutch. Cost for products purchased, MDF $80, primer 3 cans $60 finish paint $70, glaze $25. Knobs $39, flooring $175, and my hubby insisted on a new flat screen which fit just right in my wall cabinet. Yes I know he spoils me. He even got me my own personal air conditionor because the room just happens to be the warmest room in the house. go figure. Now I can cool my room down without having to cool the other 4,000 sq ft.. It couldn't have turned out any better and I absolutely love the finished room! So if you ever hear of someone remodeling their kitchen, don't walk but RUN to claim their old cabinets, you won't be sorry.


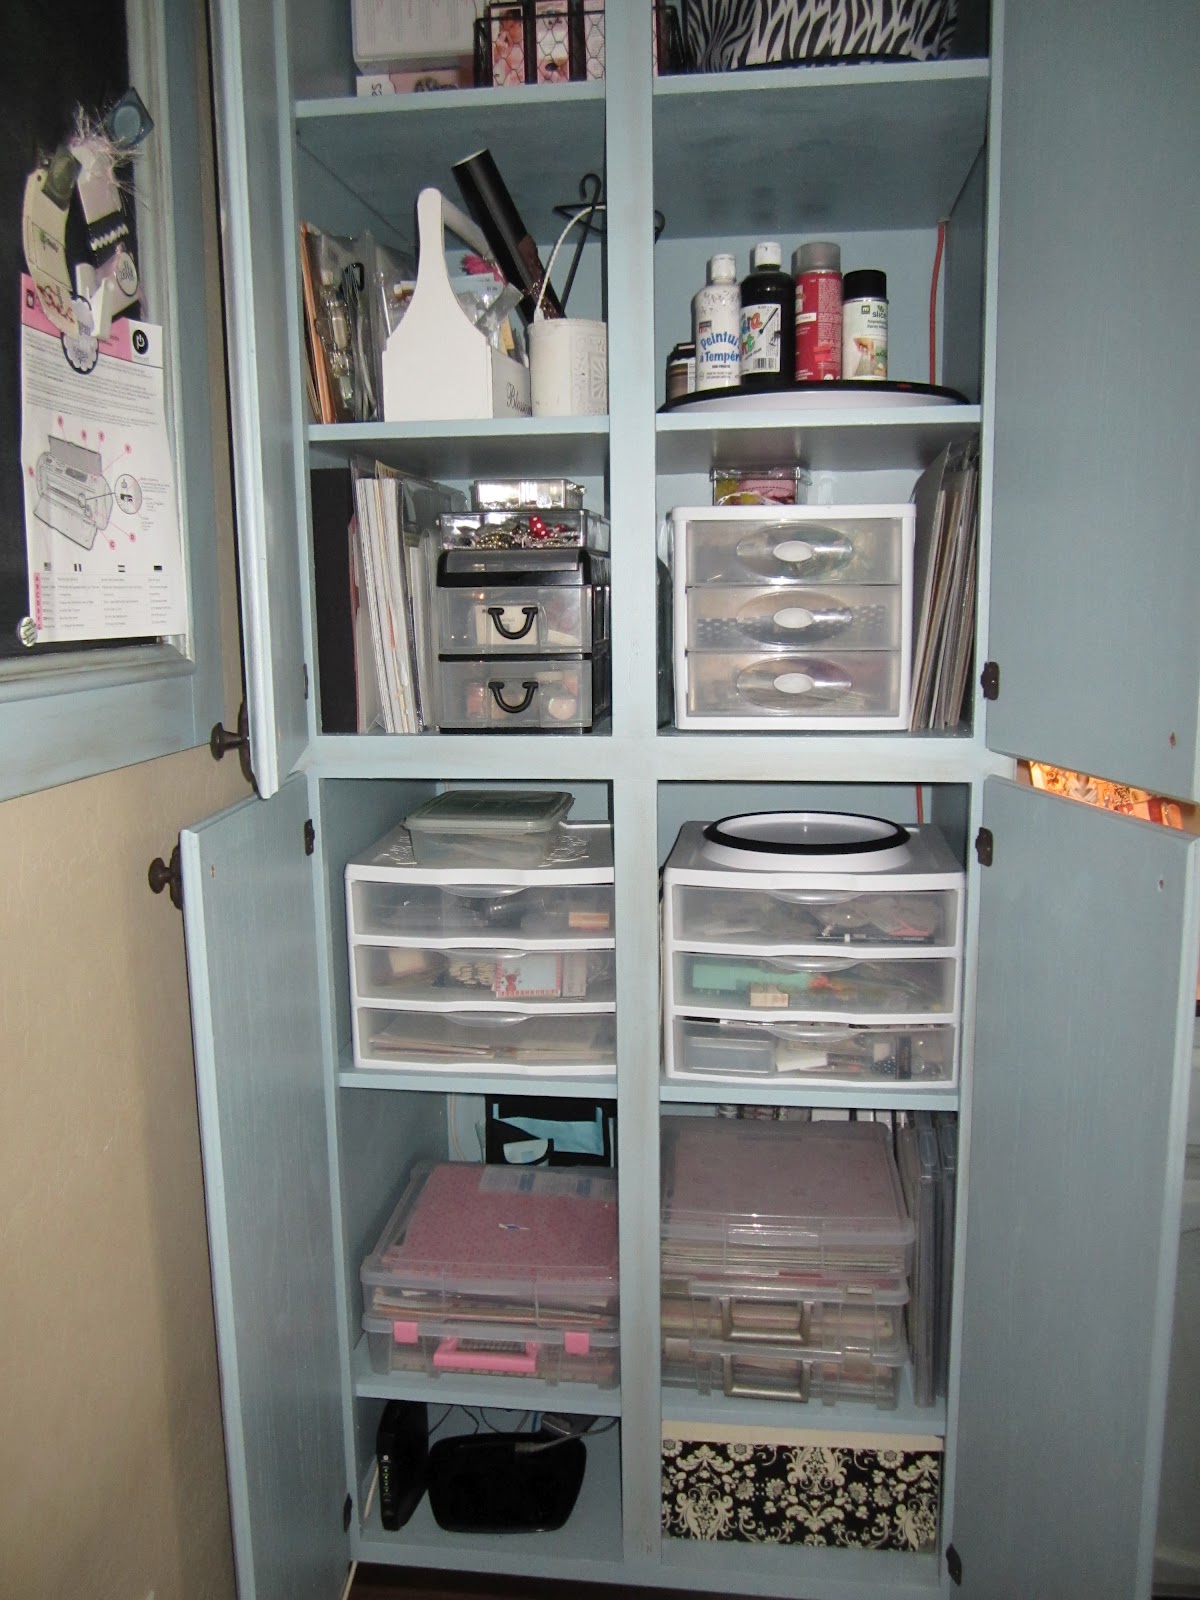
Lots of storage space here and in the hutch


Final touch was to purchase some cute fabic from Hobby Lobby and cover the counter on my island, then added a cut piece of plexiglass to make a smooth durable work surface. And yes even Randall's dog Jackson likes the new room.

Subscribe to:
Posts (Atom)